Photo texturing a Secret Santa Jam - a UV-straining report
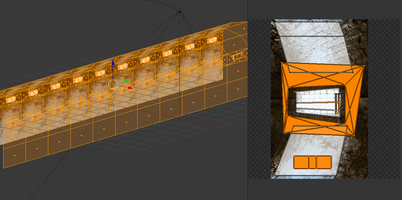
December has been an eventful month and I've finally wrapped up production of dead END, a short mystery game for the Dev Zone Secret Santa Jam 2024. The prompts I've received for this game were the following:
- Involves a train
- Is puzzling or mysterious
- Makes some use of photo textures or photo sprites
- Has a hidden cat
- Allows me to inspect a trinket or mundane prop
Now, I won't go into the details of how I dealt with each and every point, but I want at least to address the third - "makes some use of photo textures or photo sprites". For this game, my first 3D game using Godot 4, I decided to go "screw that, Imma use only photo textures". And that required some level of... let's call it creativity, when it comes to "throwing all the lessons learned about UV mapping out of the window".
In this devlog, I want to show some of the horrors I have unleashed upon this world to take care of that interesting the third bullet point.
It started with a seat
First thing first: Pixabay and Pexels are life savers, when it comes to free stock photos. I have got 99% of the textures I've used from photos uploaded there under a permissive license. So, I decided to make use of them to put together an array of props using parts and pieces of the photos I found, editing out logos (or replacing them with fictional ones) later to avoid trademark issues.
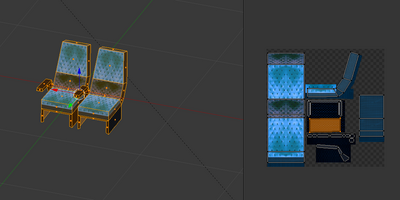
The first item in my prop list was the train seat. For that, I cut and pasted together pictures of fabric from a throne/armchair combo I found on Pixabay, mirrored, recolored it blue and adapted it to the shape of the UV.
Link to the original photo: https://pixabay.com/photos/throne-armchair-pedestal-1066397/
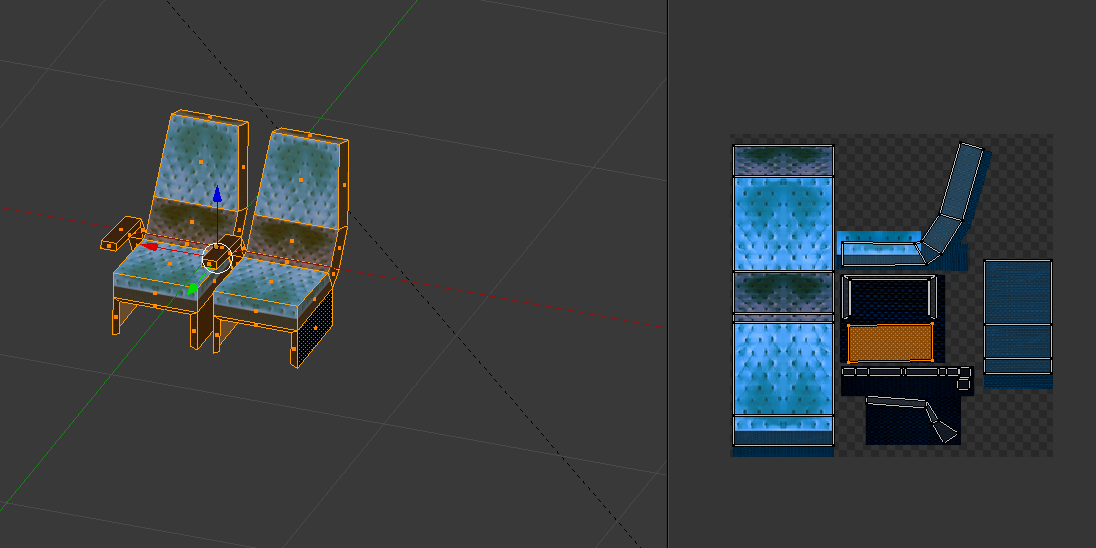
The choice of blue wasn't random - it's, in fact, the color you can see all around Italian regional and InterCity trains. It was familiar enough that I wanted to make use of it. I have used a similar system for the small table in front of the rows of seats. Since the UV is very boring, I won't add it here.
One carriage to rule them all
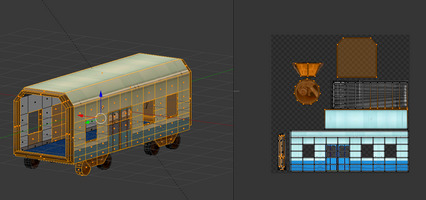
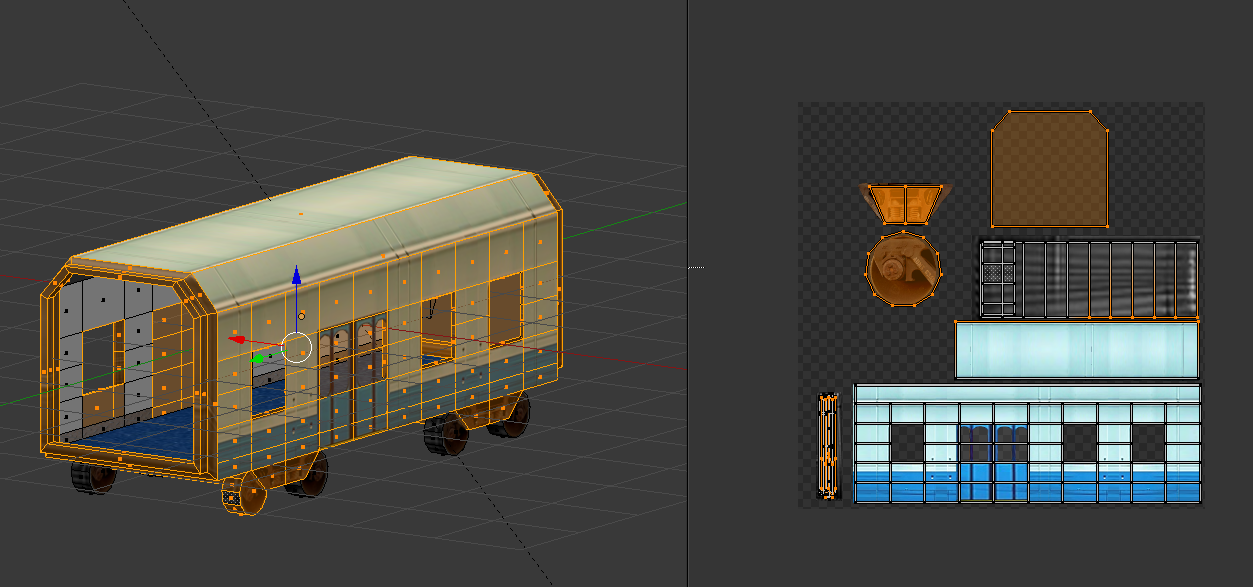
Once I finalized seats and wooden tables, I started meshing the main train carriage I'd repeat over and over in the game. I spliced different pictures of trains and train wheels to put this together, largely carving out the windows myself. The end result was satisfying, even if I realized too late that the ceiling mesh does not align properly with the sides. That's a bummer.
With my carriage ready, I could finally start putting the game in motion, having at least something that resembled an environment to move through. The next step was of course adding the external world, or something that resembled it.
Link to the original photos:
- Carriage exterior: https://pixabay.com/photos/train-transportation-speed-6910973/
- Wheels: https://www.pexels.com/photo/part-of-a-train-18500075/
Pexels Street View
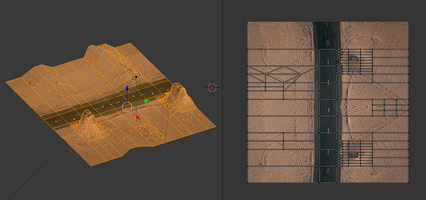
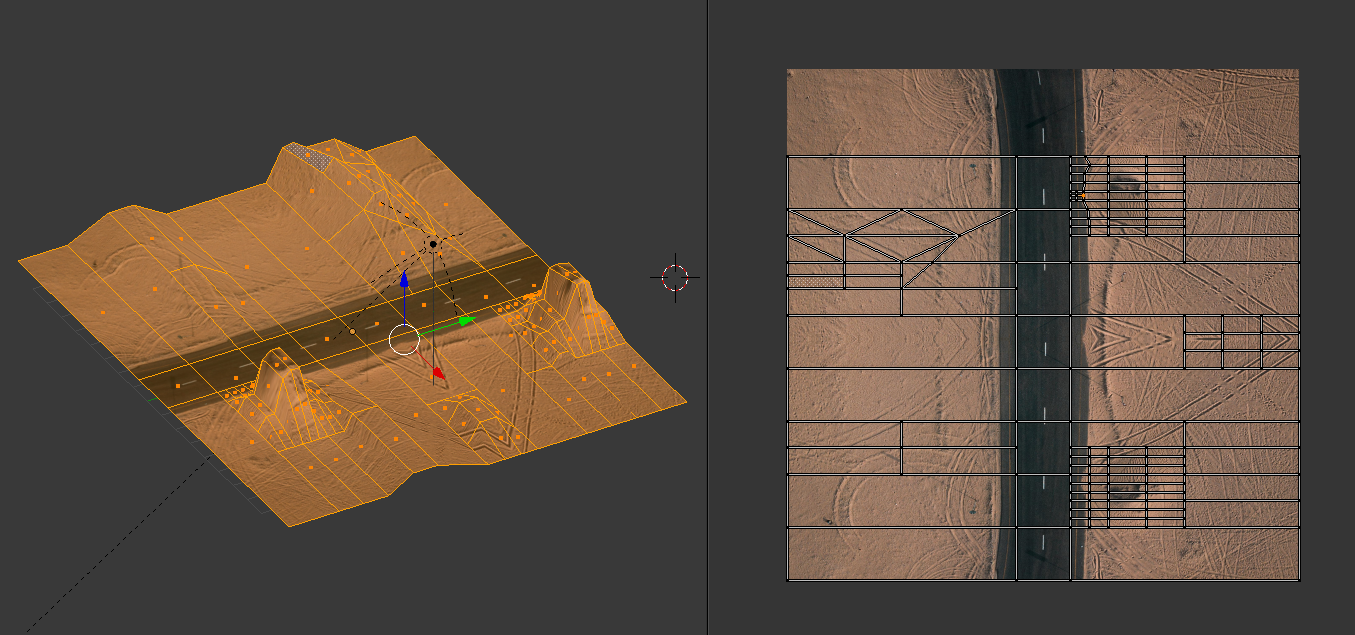
I searched for "desert street top view", until I found a suitable picture from (I think) Dubai. I cut it in half and roughly mirrored it to give my mesh more room to breathe. In hindsight, I could have added a normal map of sorts, but hey, it did the job quite well with the "limited light" environment I deployed it in.
Link to the original photo: https://www.pexels.com/it-it/foto/foto-vista-dall-alto-del-veicolo-su-carreggiata-1552235/
Teapot Time
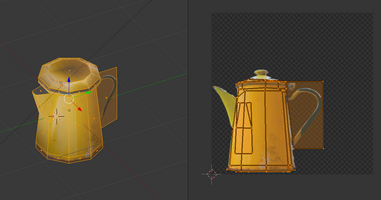
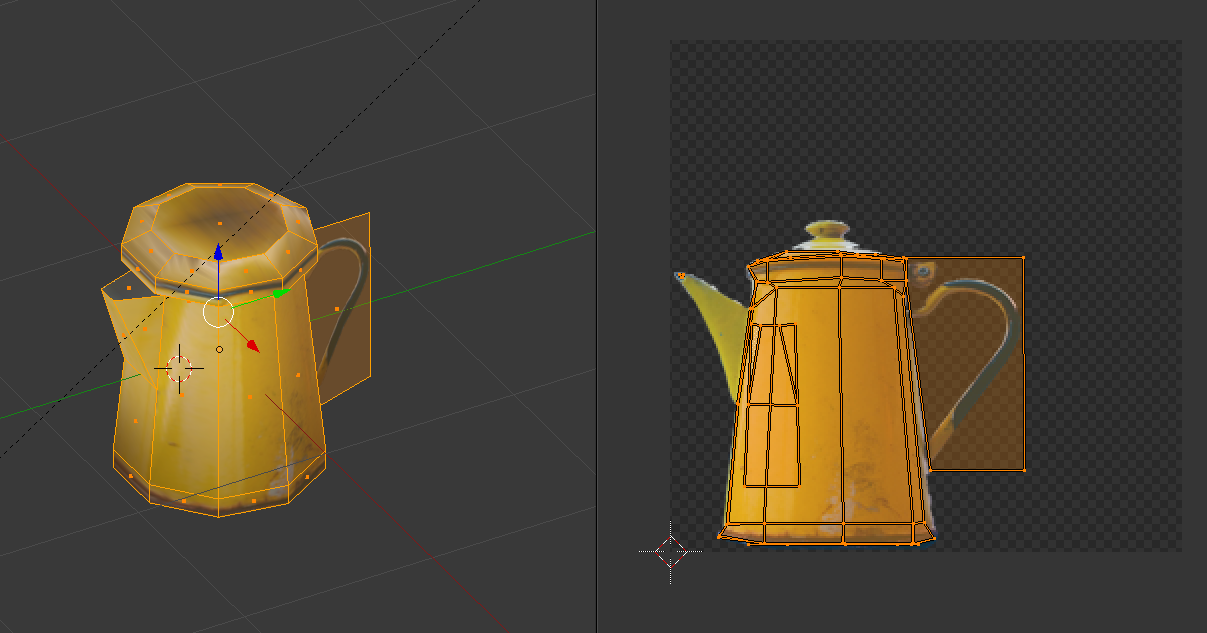
The first real prop was the teapot. A useless prop in the game, yet one that made me test how to texture a 3D body from a flat side picture. So, I snatched a sideview of one such teapot from Pixabay, cut out the background and unwrapped my mesh around it with a projection-from-view. Since the beak wasn't truly similar to what I needed, I had to play a little bit with its placement to keep it nice and dandy. The handle is a simple-ish ngon with transparency. I've set the backface culling properties of this prop to "none", so that it wouldn't disappear if the player looked at it from the wrong side.
Link to the original photo: https://pixabay.com/photos/macro-table-teapot-wooden-1868711/
Car, the woe of my meshing existence
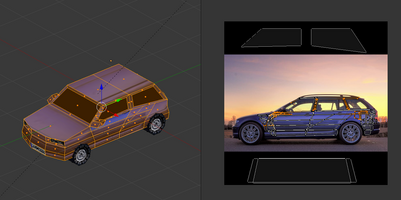
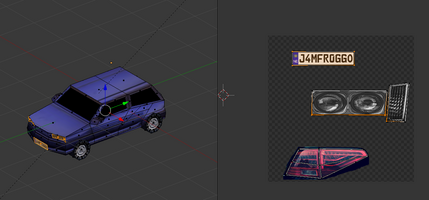
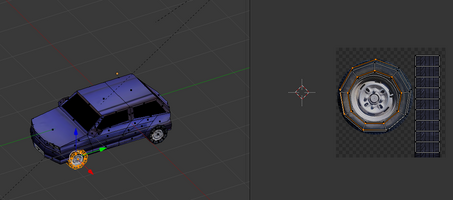
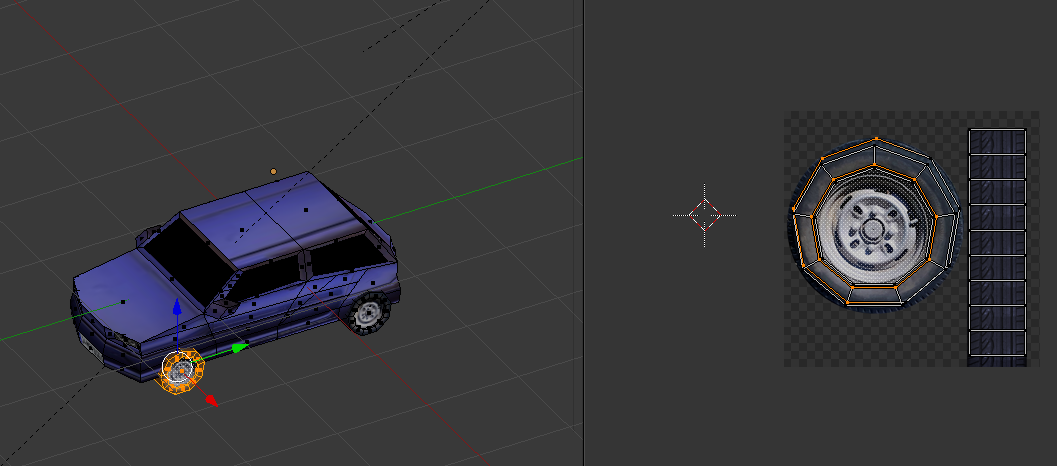
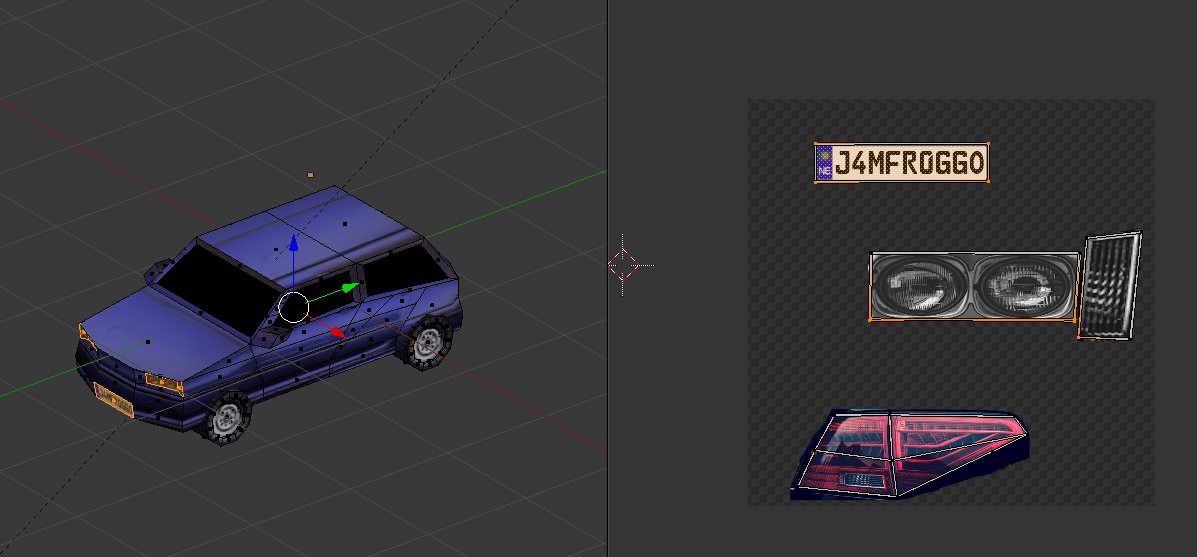
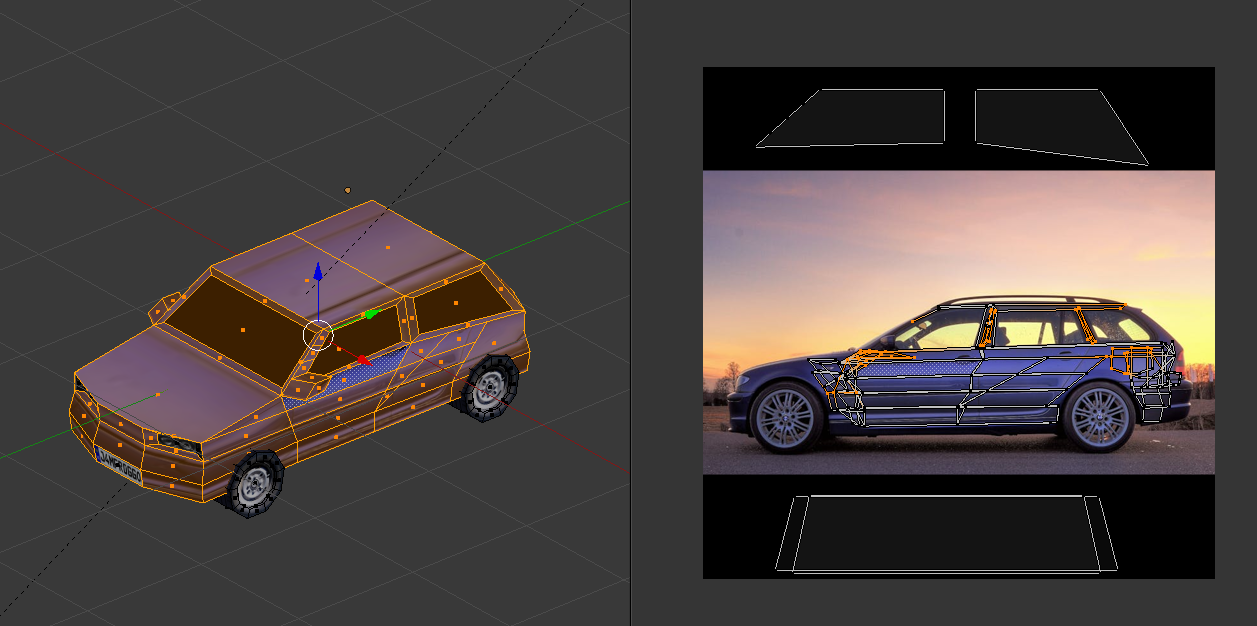
The car that is used for exactly one interaction in the game was the most complex, in terms of texturing. It makes use of four different sets of pictures, arranged in four materials.
First, the easy one: the wheel. Simple and clean. The side of the tire comes from a different picture than the front view. I had issues finding a good front view picture of a tire (now I can find several of them, bummer - just when I don't need it anymore), but in the end things worked out a-okay.
Link to the original photo: https://pixabay.com/photos/tyre-wheel-car-carry-tire-vehicle-288631/
The lights were sampled from two different pictures of car I've found on Pixabay. The license plate is a simple collage using an online generator.
Links to the original photos:
- red light/side light: https://pixabay.com/photos/auto-audi-car-tail-light-rear-1634815/
- front light: https://pixabay.com/photos/car-vintage-classic-retro-old-7828554/
The car frame - oh boy the car frame. I spent the good part of two hours trying to tie these parts together so that the car didn't look like an AI-nightmare-mess. It still looks like a mess, granted, but less of a mess than it looked at the beginning. One regret I have is that I haven't textured the bottom of the car, causing it to look wrong after it... well, you know what I mean, if you played the game. Still, this was hands down the most challenging part of the whole asset-making process. I don't want to make a 3D car for the next two months.
Link to the original photo: https://www.pexels.com/it-it/foto/fotografia-di-vista-laterale-dell-auto-durante-l-alba-995232/
Contained container
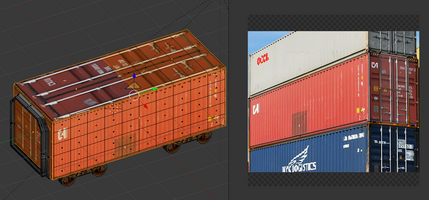
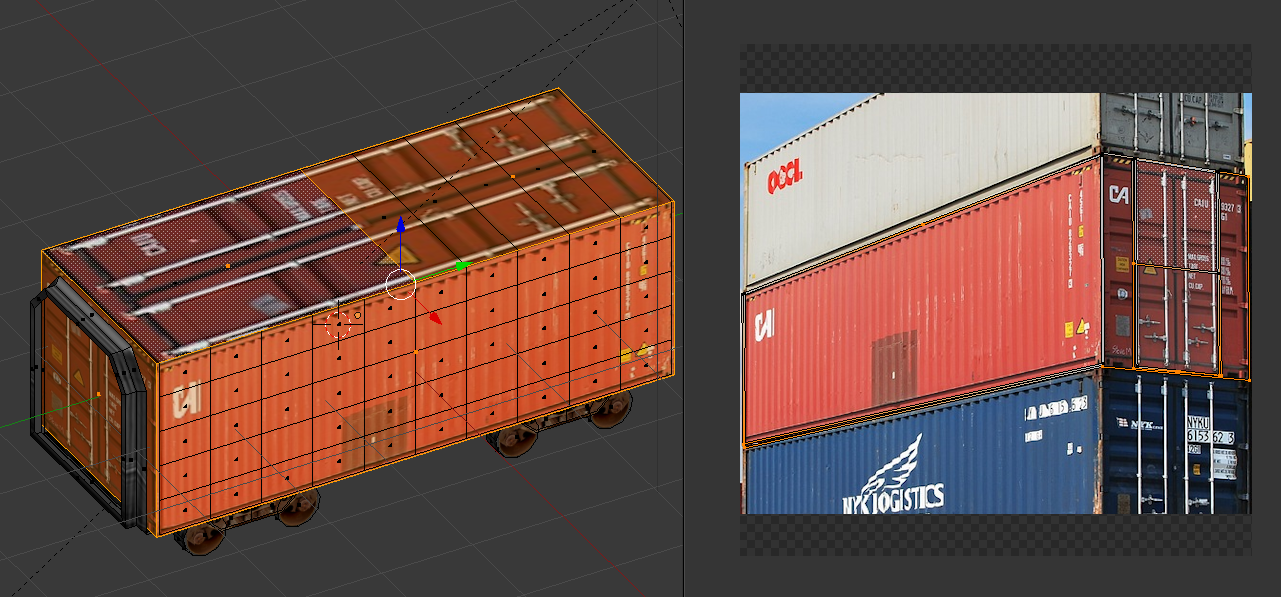
The container carriage was overall simple-ish. The only thing I had to do was delete all the relevant logos in the game-ready version, since I used the picture of a real container for it (that is, the CAI logo does NOT appear in the game). I needed to get creative with UV placements, but I can't complain about the results.
Link to the original photo: https://pixabay.com/photos/dock-container-export-cargo-441989/
Infinite tunnel
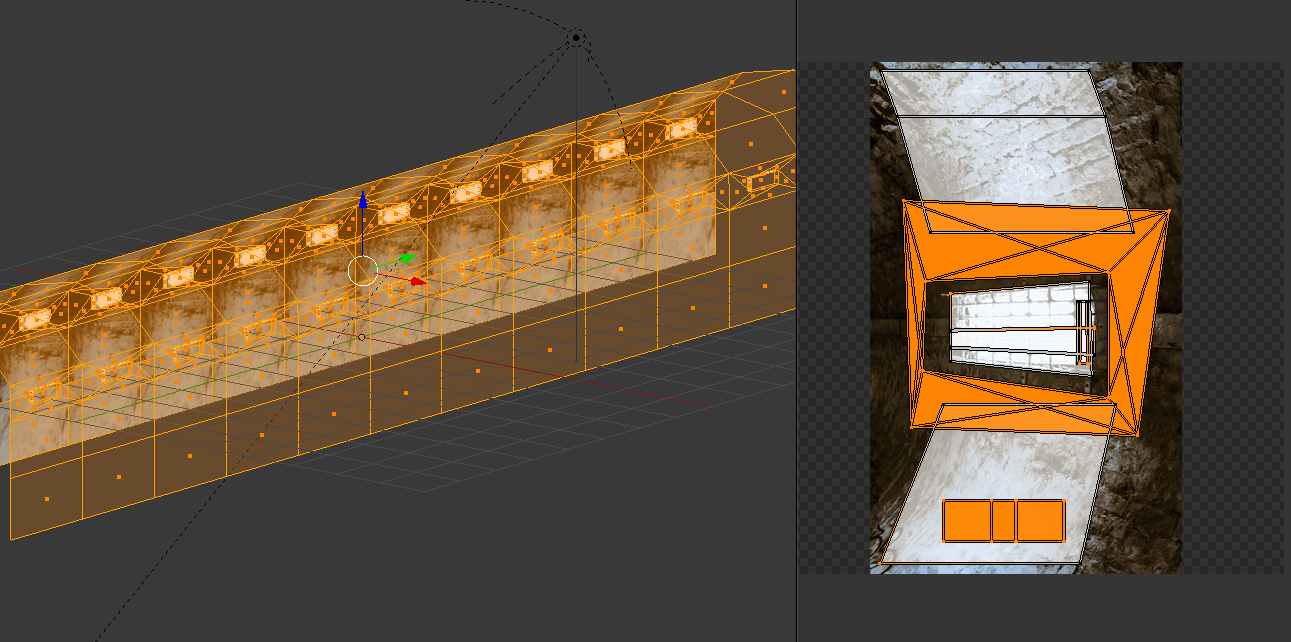
In the middle of the game, there's an infinite-looking tunnel with side lights. It might be no surprise that the UV was extremely deranged for it, while desperately looking for something that looked like a tunnel light online. I don't even remember how I stumbled upon this one, but making it work like I wanted required several leaps of faith.
Link to the original photo: https://pixabay.com/photos/graffiti-tunnel-underground-237656/
Books, lighters, cigs and keys
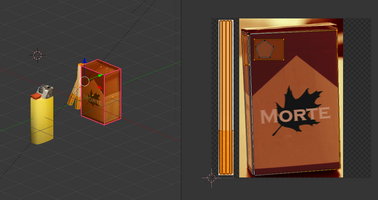
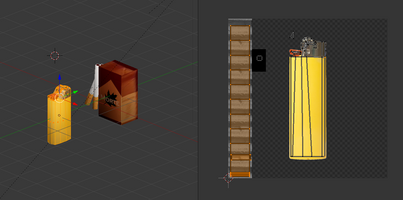
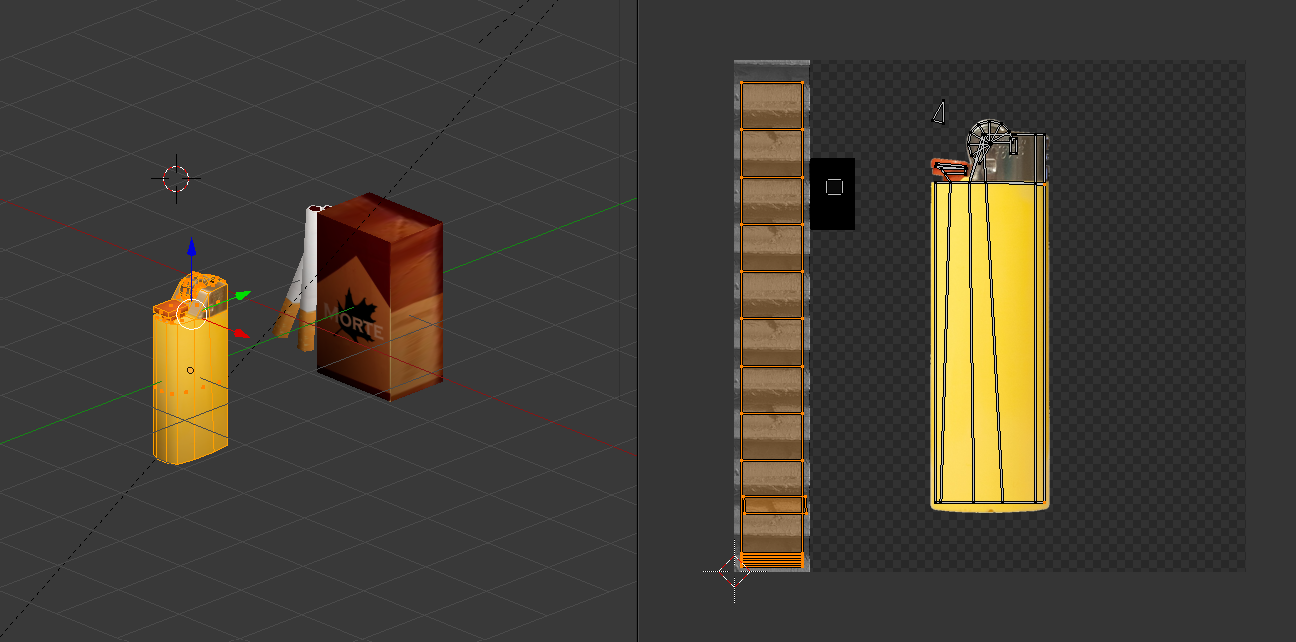
The final section of this log covers four props that appear in the game and are all built out of a single picture each - a book, a lighter, a pack of cigarettes and a key. Without further ado, here's the results of my deranged and liberal use of UVs once again. The lighter was overall simple, though I had to adapt my mesh to the shape as much as possible to make use of the limited texture at my disposal. The igniton wheel made my life harder than needed.
Link to the original photo: https://pixabay.com/photos/lighter-yellow-object-long-smoking-188717/
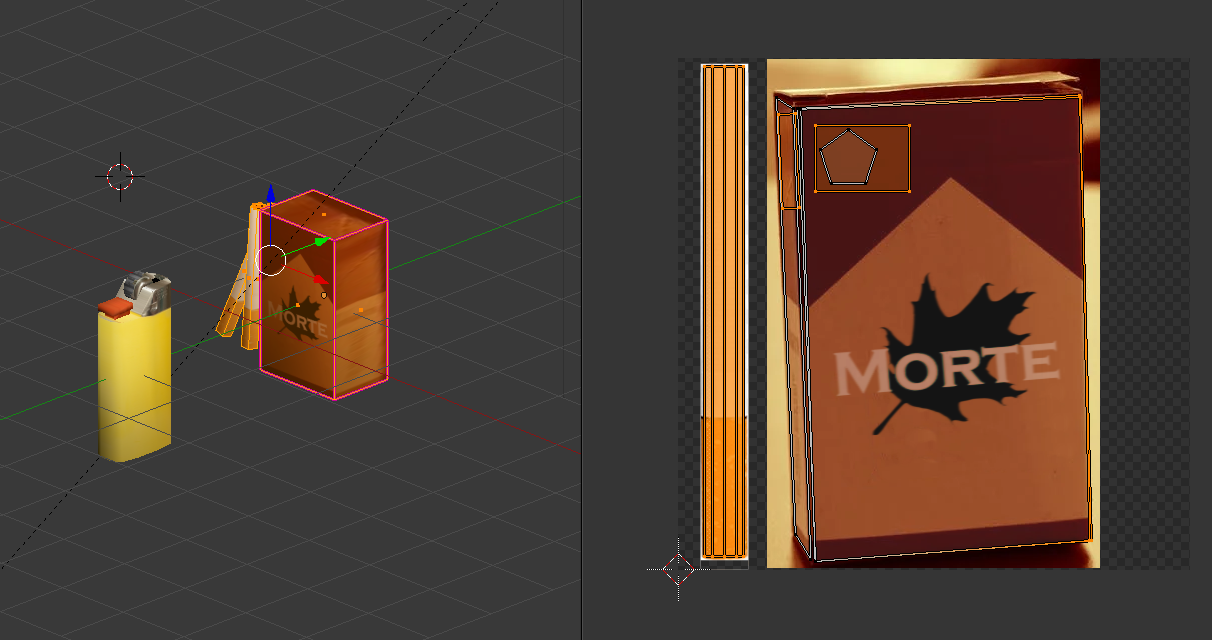
I had the luck of finding a brandless pack of cigarettes on Pexels, to which I added my ominous fictional brand name - "Morte" means literally "death". I scrubbed the original "Tobacco" branding to actually make the pack more suitable to my intended use. As a side note, I used the red from the package for the tip of the cigarettes too.
Link to the original photo: https://www.pexels.com/photo/a-pack-of-cigarette-on-the-table-5328464/
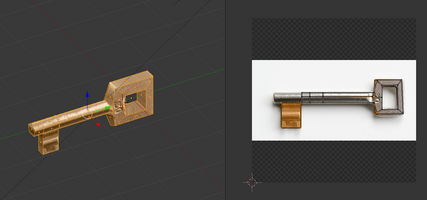
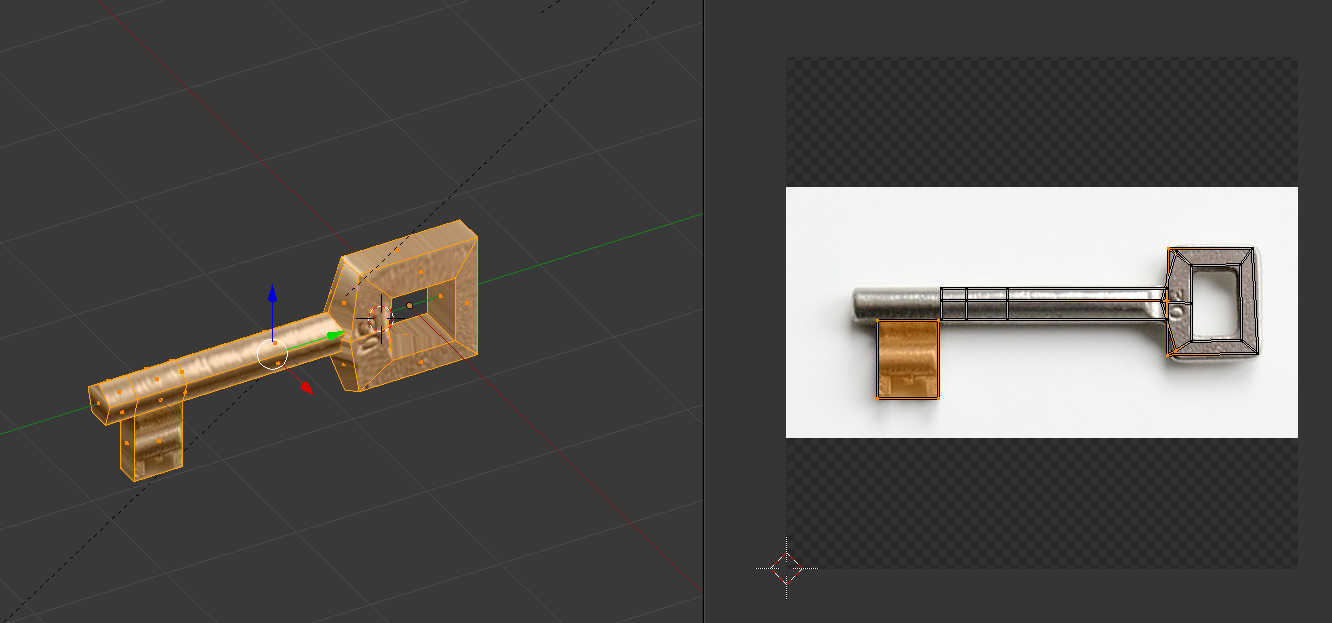
The key was relatively simple too, a straight up mad unwrap on a stock photo. For something so small that appears in just one scene, I could have gon the easy way - but no, here's me putting effort on a prop that won't be seen close up by any % of the players of this game.
Link to the original photo: https://pixabay.com/photos/key-keys-lock-locked-metal-5287093/
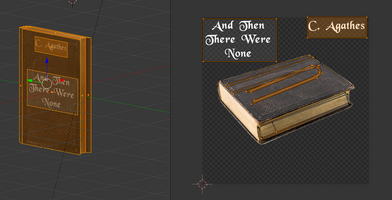
The same could be said for the book, excpt the unwrap there was slightly more creative. The title was added of course later and should be a hint to the very first puzzle in the game. I wonder how many players will actually find this prop around the train...
Link to the original photo: https://pixabay.com/photos/a-book-old-books-isolated-read-1991816/

That's all, folks!
Well, this was a fun write-up! There are some additional photos I used around, e.g. for the switch puzzle or the numpap, but these were the ones I thought they were most interesting to showcase, UV and such! I hope it was a fun ride for you too and that you enjoyed this short jam game as much as I enjoyed making it!
Leave a comment
Log in with itch.io to leave a comment.